admin June 25, 2025 Sailing Previous Lesson Practice Comments (0)
When it comes to sailing one of skills that didn't pop into my mind was that of learning to splice a rope. But we soon learn that this is a great skill to aquire.
Learning How to Splice a Rope
Why tie a knot when you can splice like a pro?
When you're learning to sail, there's something wonderfully satisfying about mastering a good rope splice. It's one of those skills that looks impossibly neat, feels like magic, and is surprisingly useful aboard any boat—from a Thames dinghy to a tall ship.
Unlike knots, which can come loose, jam up, or weaken the rope, a well-made splice is strong, smooth, and permanent—ideal for eyes, loops, or joining two lengths of rope.
So, what exactly is a splice, and how do you do it?
What is Rope Splicing?
Splicing is a method of weaving the strands of a rope back into itself or into another rope. There are different types, depending on what you want the rope to do:
Eye Splice – makes a strong, fixed loop at the end of a rope.
Back Splice – stops the end of the rope from fraying.
Short Splice – joins two ropes together permanently.
Long Splice – joins two ropes while keeping the same thickness—great for halyards or lines that need to run through pulleys.
All of these are done by unlaying (untwisting) the rope’s strands and carefully weaving them back in using a specific pattern.
What You’ll Need
A length of three-strand rope (natural or synthetic)
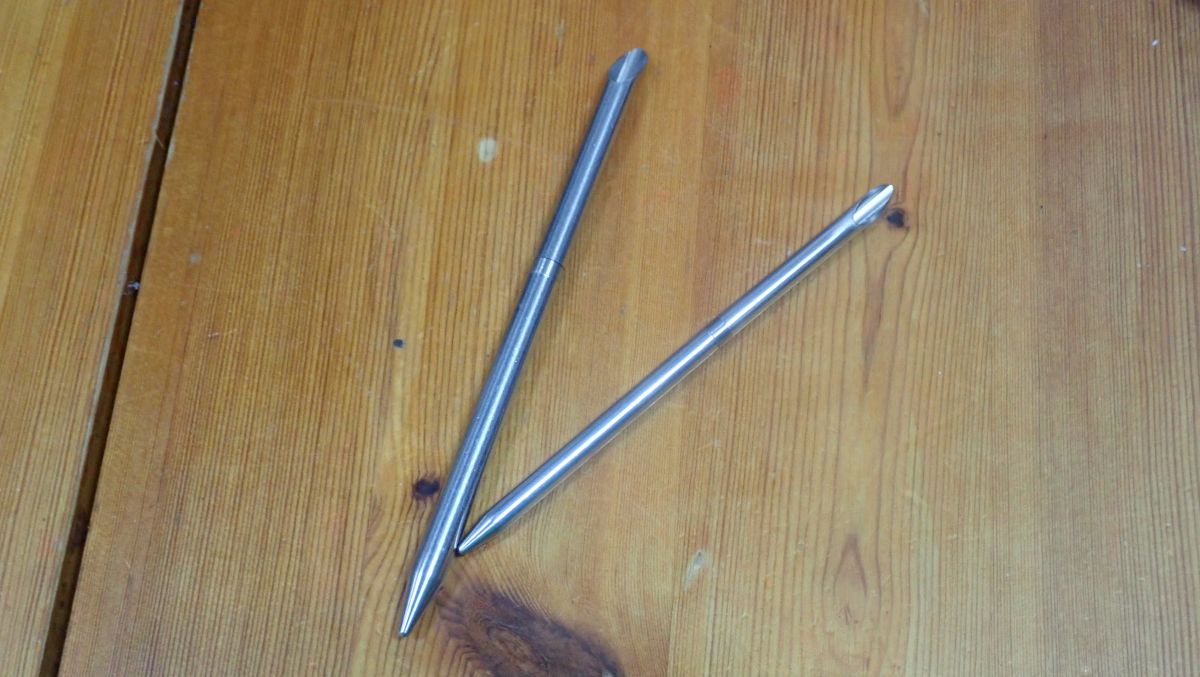
A fid or marlinspike (or a smooth pen if you’re improvising)
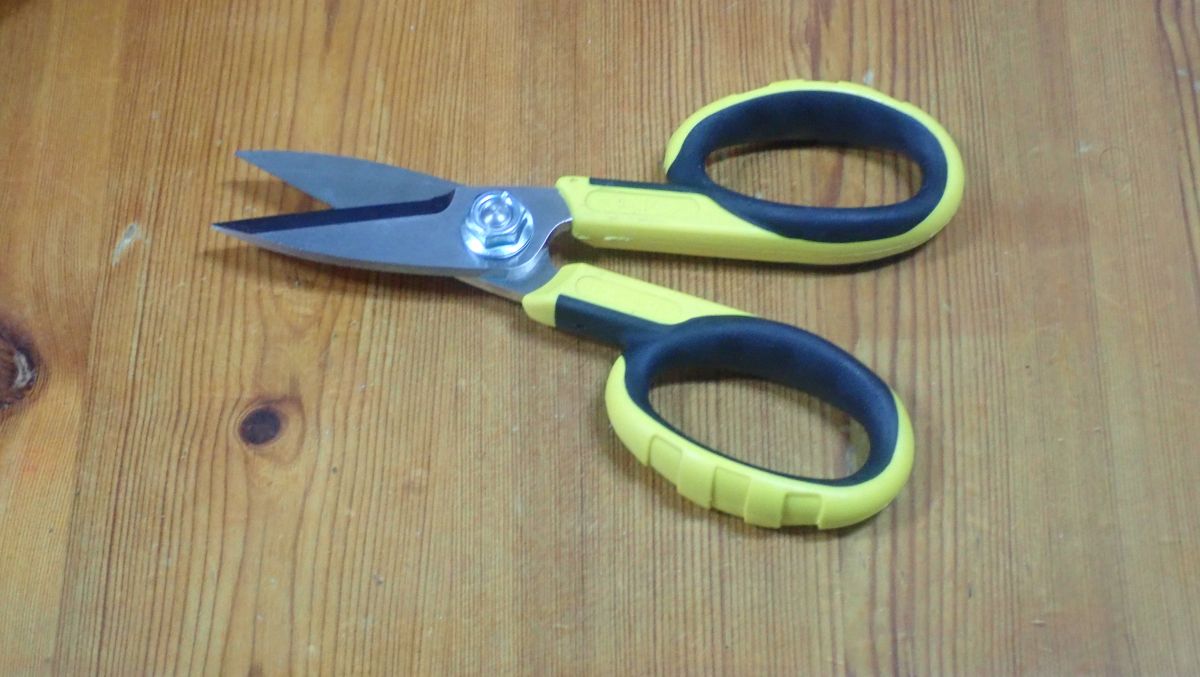
A sharp knife or scissors. If you are using Dyneema rope then you will need electricians scissors that are micro serrated.
Some tape to bind the ends
A lighter to melt the ends of the rope
Patience. And maybe a biscuit or two.
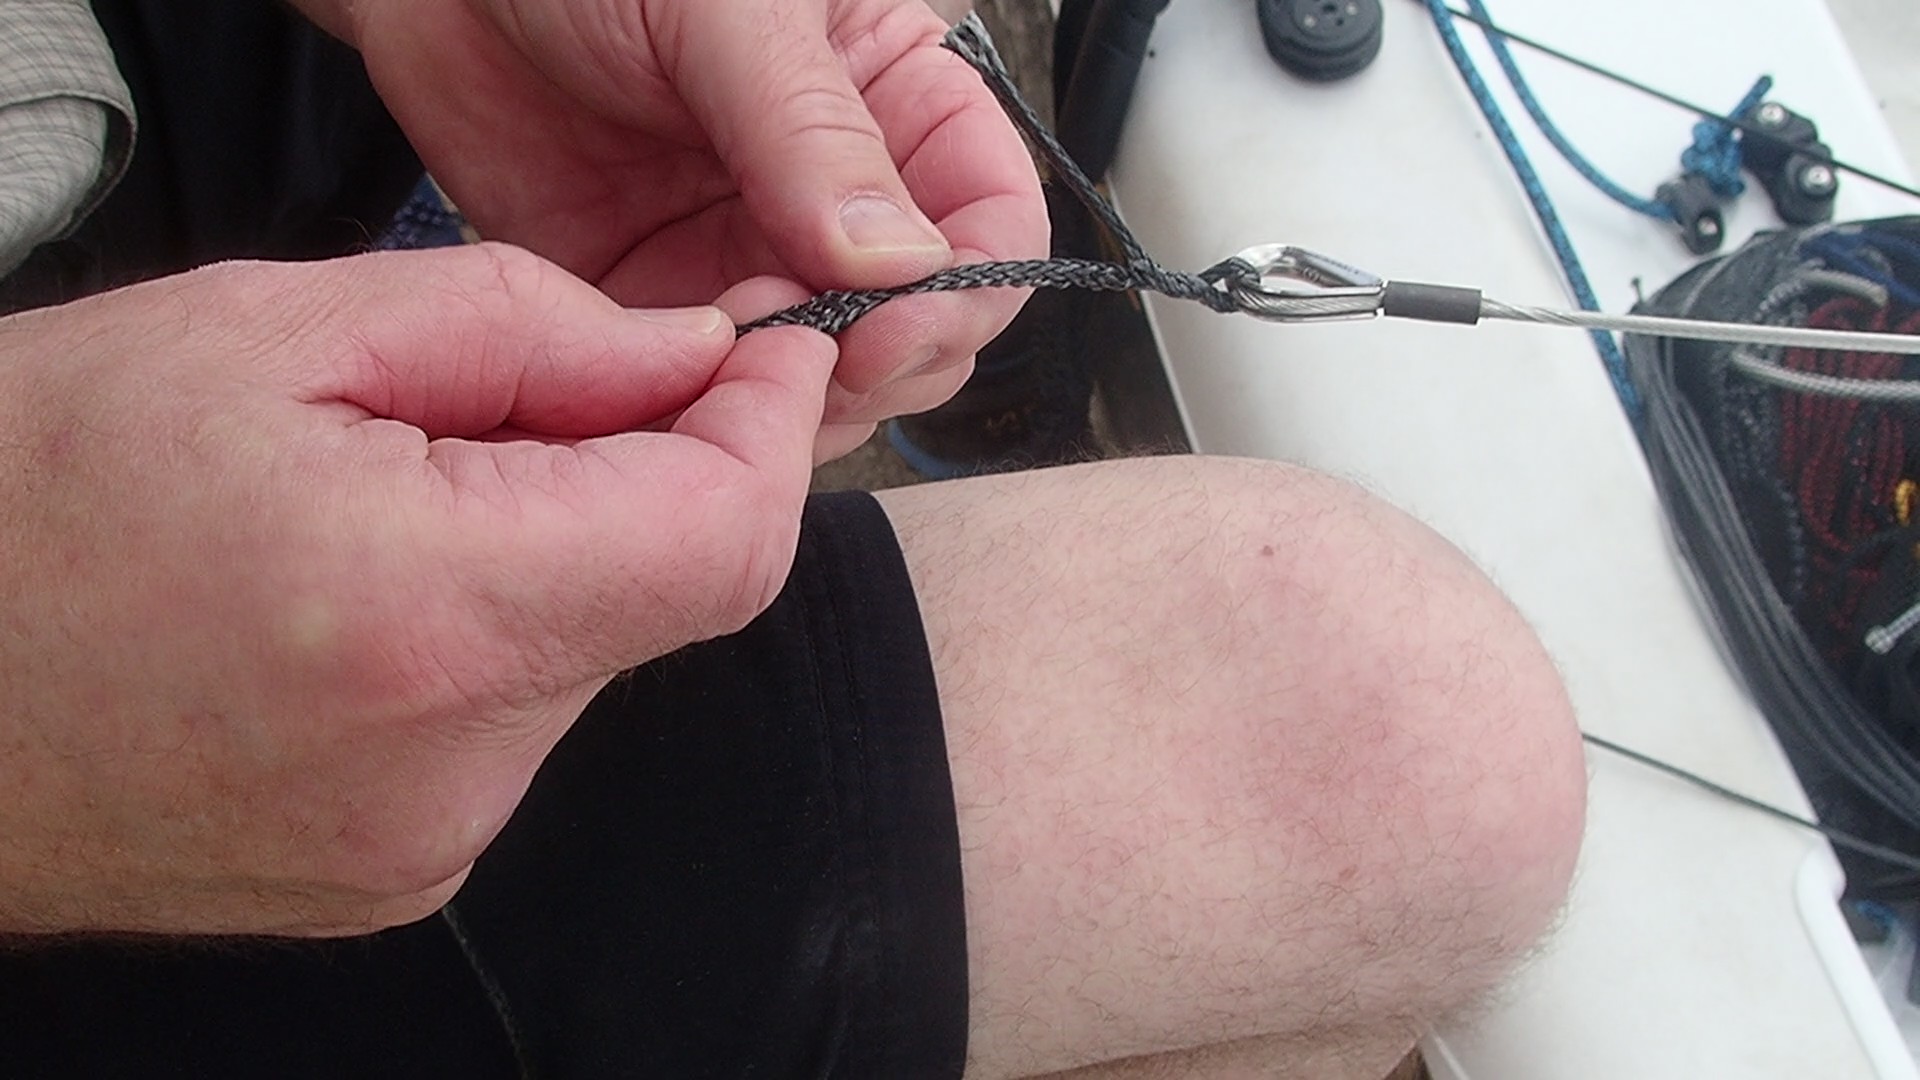
How to make and eye splice
Eye Splice – Step-by-Step (with a Loop at the End)
The eye splice is the most useful for attaching rope to a shackle, thimble, or cleat. Here’s how to do it:
Mark the loop size – bend the rope where you want the loop to start. Use tape to mark where the loop ends.
Unlay the strands – unravel the rope end about 15–20 cm beyond your mark.
Tuck one strand under the standing part (this is your first tuck).
Rotate the rope and tuck the next strand under the next strand in line.
Repeat with the third strand – now you should have three tucks in place.
Continue tucking each strand over and under the rope for another 3–4 rounds to secure it fully.
Pull each tuck tight and dress the splice neatly—it should look smooth and consistent.
Top Tips
Practice on thick rope first – it's easier to see what you're doing.
Keep the strands tidy – a messy splice won't hold well.
Tape or melt the ends – to stop synthetic rope from fraying during the process.
Keep calm – if it looks like spaghetti, take a break and come back to it!
How to Make a Back Splice
A neat and sturdy way to stop a rope from fraying
If the end of your rope is starting to look like a mop, it’s time to do a back splice. This simple ropework technique finishes the end of a three-strand rope by weaving the strands back into the rope itself, creating a thicker, rounded end that won’t unravel.
It’s strong, tidy, and a touch traditional—perfect for sailors who like things ship-shape.
🪢 Step-by-Step: Back Splice
Step 1: Unlay the Rope
Unravel about 15–20 cm (6–8 inches) of the rope’s end into its three separate strands. Tape or melt the tips if they start to fray.
Step 2: Tie a Crown Knot
This forms the base of the splice and stops it slipping.
Take strand A, pass it over strand B.
Take strand B, pass it over strand C.
Finally, take strand C and thread it through the loop created by strand A.
Pull all three strands gently to form a neat “crown” on the end of the rope.
🔄 It should look like a small three-pointed star with each strand coming out evenly spaced.
Step 3: Tuck the Strands
Now you’ll tuck each strand under the standing part of the rope, going with the natural twist:
Choose a strand and tuck it under the nearest strand of the standing rope (this is called the first tuck).
Rotate the rope slightly and tuck the second strand under the next strand of the standing rope.
Repeat for the third strand.
You should now have all three strands tucked once. This locks the crown knot in place.
Step 4: Repeat the Tucks
Make 2 or 3 more rounds of tucks for each strand, following the rope’s natural twist and spacing them evenly. Pull them tight each time.
✂️ Finish the Job
Trim off any excess from the strand ends.
You can taper the splice by making shorter final tucks (optional).
The end will now be thicker and won’t pass easily through pulleys—this is a feature, not a bug!
🧭 When to Use a Back Splice
Finishing mooring lines or sheets neatly
Preventing fraying on ropes without heat-sealed ends
Giving your rope a traditional, "proper sailor" look
🧶 It’s also oddly therapeutic. Perfect for a rainy evening in the clubhouse with a cuppa.
How to Make a Short Splice
Joining two ropes the sailor’s way
A short splice is used to permanently join two ropes end to end. It creates a strong, bulky join that's perfect for mooring lines, tow ropes, or anywhere the rope doesn’t need to run through a pulley or block.
Unlike a knot, the splice keeps much of the rope’s original strength—and looks impressively neat too!
🪢 Step-by-Step: Short Splice
Step 1: Unlay the Ropes
Unravel about 15–20 cm (6–8 inches) from the end of each rope.
Tape the tips of the strands to stop them fraying.
Lay the ropes side by side, with the unlaid ends overlapping.
🔄 It should look like the two ropes are trying to shake hands.
Step 2: Interweave the Strands
Tuck one strand from Rope A under a strand on Rope B (this is your first tuck).
Rotate the rope and tuck the second strand under the next available strand.
Repeat with the third strand.
You’ve now done the first tuck from Rope A into Rope B.
🔁 Now do the same with the strands from Rope B, tucking them into Rope A.
🧩 Think of it like “zippering” the ropes together.
Step 3: Continue Tucking
Complete 3–4 more tucks on each strand.
Pull the strands tight and lay them smoothly.
Keep going with the natural twist of the rope to make it look uniform.
Step 4: Trim and Finish
Once everything is tucked securely, trim off any excess ends.
You can whip the splice ends for extra neatness if desired.
🎯 You now have one rope, joined for good—stronger than any knot you could tie.
When to Use a Short Splice
Joining two mooring or anchor lines
Creating a longer tow rope
Replacing a damaged section of rope
Any situation where bulk isn’t a problem, but strength matters
🧠 Remember: the short splice is permanent. If you think you might want the ropes separate again—use a knot instead!
How to Make a Long Splice
Join two ropes without adding bulk – the pulley-friendly solution!
When you need to join two ropes permanently but still have them run smoothly through pulleys or blocks, the long splice is your best friend. Unlike the short splice, which creates a thick lump at the join, the long splice cleverly spreads the weave so the rope’s thickness stays the same.
Perfect for halyards, mainsheets, and any running rigging on board.
🪢 Step-by-Step: Long Splice
Step 1: Unlay the Rope Ends
Unravel about 1 metre of rope from each end.
Tape the strand ends to prevent fraying.
Lay the ropes overlapping, so each unlaid section interlocks like two brushes meeting bristle to bristle.
Step 2: Swap a Strand
Take one strand from Rope A and swap it with a strand from Rope B, tucking each into the standing part of the opposite rope.
This is your first interlock—now the ropes are looped into each other.
🔄 It may help to mark each strand with a different colour of tape to keep track.
Step 3: Unlay and Overlap the Other Strands
Now unlay one more strand from each rope a bit further down (about 20–30 cm), and again tuck them into the opposite rope.
You should now have each rope woven partly into the other, and it’s time to bury the strands.
Step 4: Tuck and Trim
Tuck each loose strand into the twist of the opposite rope at least 3–4 times, following the natural spiral.
Trim the ends gradually as you go to taper the splice and keep the diameter even.
✂️
For a neater finish, you can stagger the tucks so the final splice gradually blends into the rope.
✅ When to Use a Long Splice
Joining halyards, sheets, or control lines
Extending ropes that must run through blocks, pulleys, or sheaves
Creating a nearly invisible join that keeps the same strength and thickness
💡 Handy Tips
Practice on old rope first—it’s more flexible and forgiving.
Always work in the direction of the twist.
The finished splice should look like a seamless continuation of the rope.
🧠 It takes a little longer to learn than a short splice, but it’s well worth the effort—and quite the sailor’s party trick!
When Should You Splice?
Splicing is particularly useful for:
Making towlines and mooring lines
Creating a loop for a painter or shackle
Securing the end of a rope neatly (back splice)
Joining ropes without bulky knots (short or long splice)
In short, if you’re sailing regularly—or just enjoy the look of a ship-shape rope—splicing is worth learning.
Learn With Us
We often practise ropework and splicing in our sailing sessions at Upper Thames Sailing Club. Whether you’re crewing a dinghy or launching a safety boat, knowing how to splice a rope is a skill that’ll impress the old salts and help keep your boat in good nick.
🔗 Visit the blog at pmrsailing.uk for more beginner-friendly sailing articles and hands-on tips for getting confident on the water. Want to Learn More?
Check out our ropework guides and video tutorials at pmrsailing.uk—covering everything from figure-eight knots to eye splices and beyond.